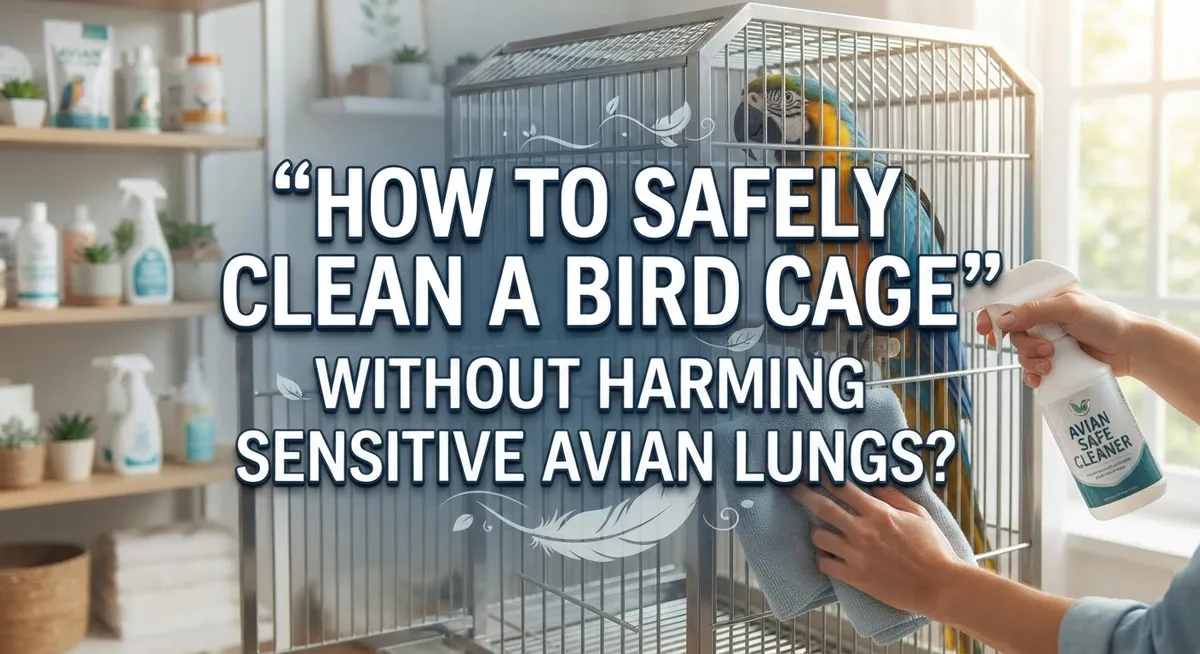
How to Safely Clean a Bird Cage Without Harming Sensitive Avian Lungs?
Your feathered friend depends on clean air to breathe easy. Bird lungs work differently than ours. They are incredibly sensitive to fumes, dust, and chemical residue.
That makes cage cleaning a bit tricky. The wrong cleaner can cause real harm. Even a strong smell left behind can irritate your bird’s airways.
The good news? You can keep the cage spotless and safe at the same time. It just takes the right steps and the right products.
This guide walks you through the whole process. You will learn how to remove your bird safely before you start. You will also learn which cleaning solutions work well without posing risks.
By the end, you will know exactly how often to clean, what to use, and how to dry everything completely before your bird returns home. Let’s make cage cleaning simple, safe, and stress free for both of you.
In a Nutshell
- Always remove your bird first. Move it to a safe room before you start cleaning. This keeps its lungs away from fumes and cleaning dust.
- Take the cage apart. Dismantle removable parts like trays, perches, and dishes. Soak them in warm soapy water for a good clean.
- Choose bird safe solutions. A simple mix of white vinegar and water works great. You can also use diluted bleach, just make sure to rinse it completely.
- Let disinfectant sit for a few minutes. Give it 5 to 10 minutes to kill germs properly. Do not rush this step.
- Rinse everything thoroughly. Residue from cleaners can irritate your bird’s airways. Rinse until you can no longer smell any chemicals.
- Dry completely before your bird returns. Damp surfaces attract mold and bacteria. Wait until every part is fully dry.
- Stick to a schedule. Spot clean daily and do a deep clean weekly. This keeps things simple and manageable.
Why Bird Respiratory Systems Are So Sensitive to Chemicals
Birds have lungs that work very differently from human lungs. Their respiratory system is far more efficient and sensitive to irritants in the air. This unique design makes them vulnerable to chemical fumes and dust particles that humans might barely notice.
A bird’s lungs don’t have the same protective barriers that human lungs do. Instead of a simple in and out breathing pattern, birds have air sacs throughout their body. These sacs create a continuous flow of air through their lungs, even when they exhale. This means any harmful particles or fumes stay in their system longer.
Chemical sensitivity is the biggest concern when cleaning bird cages. Birds lack the ability to cough up irritants the way we do. Their lungs cannot filter out toxic fumes effectively. Even small amounts of bleach residue, ammonia, or strong perfumes can cause serious respiratory damage.
The bird’s respiratory system also processes air very quickly. A bird’s breathing rate is much faster than a human’s. This rapid breathing means they inhale more air per minute, which means they also inhale more pollutants if chemicals are present.
Certain cleaning products release fumes that linger in the air for hours. These invisible gases can irritate the delicate tissues inside a bird’s lungs. Over time, repeated exposure to harsh chemicals can cause chronic respiratory disease.
This is why gentle, natural cleaning solutions are essential for bird owners. Water, vinegar, and baking soda do the job without putting your bird’s health at risk. Understanding your bird’s fragile respiratory system helps you make safer cleaning choices every single time.
Preparing Your Bird and Workspace Before Cleaning
Your bird needs a safe space before you start any cleaning work. Move your feathered friend to a separate room where it cannot inhale fumes or cleaning solutions. A quiet, comfortable area works best. Make sure the temporary space has food, water, and perches so your bird stays calm during the process.
Next, gather your workspace supplies. You will need clean towels, a large basin or sink, and your chosen cleaning solution. Set up your work area near a window or in a well ventilated room. Good air flow helps fumes escape quickly and keeps your workspace fresh.
Dismantle the cage completely if possible. Remove all perches, dishes, toys, and removable trays. This step matters because bacteria hide in corners and crevices. You cannot clean these spots properly while parts stay attached. Place smaller items in one pile and larger pieces in another for organization.
Fill your basin with warm water before adding any cleaning agent. Warm water helps dissolve dirt and debris more effectively than cold water. Let removable cage parts soak for several minutes. This softens buildup and makes scrubbing easier on both the cage and your hands.
Check your cleaning solution choice one more time. Avoid anything with strong chemical odors or ammonia. Your bird’s lungs cannot handle these irritants. Simple, gentle solutions keep everyone safe while still disinfecting properly.
Finally, prepare your drying area. Lay out clean towels or cloth on a flat surface. You will need space to dry every piece before reassembling. A sunny windowsill works wonderfully because sunlight naturally kills bacteria and helps everything dry faster.
Step-by-Step Guide to Cleaning a Bird Cage Safely
Start by removing your bird to a separate, safe room. Close the door so your pet cannot wander back during cleaning. This step protects your bird from inhaling fumes and getting stressed by the process.
Next, take out all removable items from the cage. Remove perches, food dishes, water bowls, and cage trays. These parts collect the most dirt and bacteria, so they need individual attention.
Place all removable parts into a basin filled with warm water. Add your chosen cleaning solution to the water. Let everything soak for several minutes to loosen stuck on debris and droppings.
Use a soft brush or cloth to scrub each item gently. Pay special attention to corners and crevices where bacteria hide. Rinse each piece thoroughly under running water until no soap residue remains.
For the cage itself, wipe down all surfaces with your cleaning solution. Use a cloth or soft sponge to reach every bar and corner. Let the solution sit for 5 to 10 minutes to disinfect properly.
Now comes the critical rinsing step. Rinse every single surface multiple times with clean water. Any leftover cleaner can damage your bird’s sensitive lungs. Wipe the cage dry with towels or let it air dry completely.
Before returning your bird, double check that everything is completely dry. Wet surfaces attract mold and bacteria growth. Your cage should feel dry to the touch everywhere.
Only when the cage and all items are fully dry should you return your bird home. Your feathered friend can now enjoy a clean, safe space without respiratory risks.
Bird-Safe Cleaning Solutions and How to Mix Them
Bird safe cleaning solutions protect your feathered friend’s delicate respiratory system. You need to understand what makes a solution safe before mixing it.
White vinegar and water is your simplest option. Mix one part vinegar with two parts water. This combination cuts through grime while remaining completely safe for birds. Vinegar naturally disinfects without releasing toxic fumes into the air.
Another effective choice combines vinegar with baking soda. Mix equal parts of each into a paste. Add a few drops of lemon essential oil if you want extra freshness. This paste works well on stubborn stains and dried droppings.
Some bird owners prefer a diluted bleach solution for heavy disinfection. Use half a cup of bleach per gallon of water. This ratio kills bacteria and fungi effectively. However, bleach requires extra careful rinsing because any residue harms bird lungs.
When mixing any solution, use room temperature water. Warm water helps cleaning agents work better. Stir your mixture thoroughly to combine all ingredients evenly.
Store your prepared solutions in clearly labeled containers. Keep them away from your bird’s cage area. Never mix different cleaning solutions together, as this creates dangerous chemical reactions.
Test your solution on a small cage area first. Wait a few minutes to ensure your bird shows no signs of irritation when you return it later. This simple test prevents respiratory problems.
Always prepare your solution fresh before cleaning. Old mixtures lose effectiveness and may develop bacteria. Fresh solutions work harder and keep your bird safer. Your preparation time now prevents health issues later.
Rinsing and Drying Techniques That Prevent Residue Buildup
Rinsing removes cleaning solution residue that can harm your bird’s respiratory system. This step matters more than most bird owners realize. Incomplete rinsing leaves chemical particles that your bird breathes in during normal cage activity.
Start rinsing immediately after your disinfectant sits for the recommended time. Use clean, running water from your tap. Rinse each cage part thoroughly under flowing water for at least 30 seconds per item. Pay special attention to corners, perches, and food dishes where solution pools.
For cage bars and hard surfaces, rinse multiple times. The first rinse removes visible solution. The second and third rinses eliminate hidden residue trapped in grooves and crevices. Your nose should detect zero chemical smell when you finish rinsing.
Drying prevents moisture from creating mold and bacteria growth inside the cage. Mold spores damage avian lungs just like cleaning chemicals do. Pat all items dry with clean towels first. This removes excess water quickly.
Air drying completes the process. Place cage parts in a well ventilated area away from direct sunlight. Ensure good airflow around every item. Most cage components dry within 2 to 4 hours depending on humidity levels.
Check everything before reassembling. Run your hand across surfaces. They should feel completely dry, not damp or cool. Damp spots indicate trapped moisture that needs more drying time.
Never rush this stage. Returning your bird to a wet cage causes respiratory stress. Your bird’s health depends on thorough rinsing and complete drying. These final steps protect your feathered friend from invisible hazards that cleaning solutions create.
Common Cleaning Mistakes That Put Avian Lungs at Risk
Birds have extremely delicate lungs. Their respiratory systems differ significantly from human lungs, making them vulnerable to airborne irritants. Even small amounts of chemical residue can cause serious harm.
One major mistake is cleaning the cage while your bird remains inside. Many people think a quick wipe down is harmless. Your bird breathes in fumes and particles during the entire process. This direct exposure damages sensitive lung tissue immediately. Always remove your bird to another room first.
Leaving bleach residue is another critical error. People rinse quickly and assume the cage is safe. Bleach particles linger on surfaces even after rinsing. Your bird’s feet touch these residues constantly. Fumes continue releasing into the air for hours. Thorough rinsing requires multiple passes with fresh water each time.
Using harsh commercial chemicals puts avian lungs at serious risk. Many standard household cleaners contain ammonia or phenols. These substances irritate bird respiratory systems severely. Some owners don’t realize that strong smells indicate dangerous fumes. If you smell something pungent, your bird will suffer from it.
Inadequate drying creates another problem. Moisture trapped in the cage promotes mold growth. Mold spores are extremely harmful to birds. They cause respiratory infections and fungal diseases. Ensure every surface dries completely before your bird returns.
Not changing water bowls frequently enough allows bacteria buildup. Dirty water dishes contaminate your bird’s environment. Bacteria release toxins that affect lung function over time.
Skipping spot cleaning between deep cleans lets debris accumulate. Droppings and old food create ammonia fumes naturally. These fumes damage avian lungs gradually. Daily spot cleaning prevents this harmful buildup.
Understanding these mistakes helps you protect your bird’s health effectively.
Setting a Daily and Weekly Cleaning Schedule
A consistent cleaning schedule keeps your bird healthy and safe. Your feathered friend needs both daily attention and weekly deep cleaning to stay in a clean environment.
Daily spot cleaning takes just 10 to 15 minutes each morning. Remove soiled bedding, droppings, and uneaten food from the cage floor. Wipe down perches and surfaces where your bird spends the most time. Change water bowls completely and refill with fresh water. Check food dishes for mold or contamination and replace them with clean ones.
Daily spot cleaning prevents bacteria and mold from building up. It also keeps odors under control. Your bird breathes easier when fresh air circulates through a relatively clean space.
Weekly deep cleaning happens once every seven days. This is when you remove your bird to a safe, secure room. Take apart removable cage components like trays, grates, and perches. Soak these parts in warm soapy water for several minutes. Apply your bird safe cleaning solution to all cage surfaces and let it sit for the recommended time.
Weekly deep cleaning targets hidden corners and hard to reach spots. Bacteria and debris accumulate in these areas over time. Thorough disinfection prevents respiratory infections and keeps your bird’s lungs protected.
Set your cleaning days on a calendar. Many bird owners clean on the same day each week. This routine becomes automatic and ensures you never skip important maintenance.
Consistency matters most for your bird’s health. A bird living in a regularly cleaned cage shows fewer respiratory problems and lives a longer, happier life. Your dedication to this schedule directly protects your feathered companion’s wellbeing.
Troubleshooting Lingering Odors, Stains, and Mold
Lingering odors, stains, and mold indicate your cage needs targeted cleaning solutions. These problems develop when moisture, bacteria, and debris accumulate in hard to reach spots.
Odors often signal bacterial growth beneath perches or inside corners. White vinegar works effectively here because it neutralizes odor causing bacteria naturally. Mix one part vinegar with two parts water, spray affected areas, and let sit for five to ten minutes. The smell disappears as the solution dries completely.
Stubborn stains require soaking time. Remove stained cage components and soak them in warm soapy water for thirty minutes to two hours. This loosens dried waste without harsh scrubbing. For persistent stains, use a soft brush gently during soaking rather than aggressive scrubbing that damages cage surfaces.
Mold represents a serious respiratory threat to your bird. Mold thrives in damp, dark spaces like cage corners and under food dishes. Prevent mold by ensuring complete drying after every cleaning. Use a clean cloth to wipe moisture from all surfaces, then air dry the cage fully before your bird returns.
If mold already appears, address it immediately. A diluted bleach solution kills mold spores effectively, but requires thorough rinsing afterward. Use one half cup bleach per gallon of water, apply it to moldy areas, let sit for five minutes, then rinse multiple times with plain water.
Check your cage weekly for early signs of these problems. Spot cleaning daily prevents odors and mold from developing. Remove soiled bedding, wipe food residue, and change water immediately. This simple habit stops small issues from becoming major cleaning challenges that stress your bird’s sensitive lungs.
Final Thoughts
Cleaning your bird’s cage the right way protects their tiny lungs. Birds breathe differently than humans, and their bodies absorb fumes fast. This makes every cleaning choice matter.
You now know the full process. Remove your bird first. Soak parts in warm soapy water. Apply a safe disinfectant and let it sit. Rinse thoroughly. Dry completely.
Skipping any step creates risk. Rushing rinsing or drying leaves behind moisture or chemical residue. Both can hurt your bird’s airways over time.
Simple solutions work best. A vinegar and water mix cleans without harsh fumes. Diluted cleaners like Simple Green also get the job done safely. Bleach can work too, but only with careful rinsing and full drying afterward.
Daily spot cleaning keeps things manageable. Weekly deep cleaning stops buildup before it becomes a bigger problem. Together, these habits create a cage that stays fresh and safe.
Think of cage cleaning as part of your bird’s daily care routine, not an occasional chore. Consistency protects your bird’s health far more than one deep clean ever could.
Pay attention to smells, stains, and any mold you spot. These signs tell you something needs attention right away. Catching problems early keeps your bird safe and comfortable.
Your bird depends on you to create a clean living space. Their lungs are delicate, but with the right steps, you can avoid unnecessary risks.
Take your time with each cleaning session. Follow the steps in order. Use gentle products. Rinse well. Dry fully.
Your bird will thank you with better health, more energy, and a longer life by your side.
Frequently Asked Questions
Can I clean the cage while my bird is inside?
No. Always remove your bird to a safe, separate room before you start cleaning. Birds need to stay away from cleaning solutions, fumes, and wet surfaces. A quiet bathroom or bedroom works well. Make sure the space has perches, water, and toys so your bird stays calm during the cleaning process.
What cleaning solution is safest for bird lungs?
White vinegar mixed with water is your best choice. Use a 1 to 2 ratio (one part vinegar to two parts water). This solution disinfects without toxic fumes. Baking soda also works well for scrubbing surfaces. Avoid anything with ammonia, bleach smell, or strong perfumes. These irritate avian lungs quickly and cause serious health problems.
How often should I deep clean versus spot clean?
Spot clean daily by removing droppings, uneaten food, and wet bedding. This takes 10 to 15 minutes. Deep clean your entire cage once per week. During deep cleaning, dismantle removable parts, soak them in warm soapy water, and scrub all surfaces. Weekly deep cleaning prevents bacteria and mold from building up in hidden corners.
What happens if I don’t rinse thoroughly after cleaning?
Leftover cleaning residue damages your bird’s respiratory system. Even small amounts of bleach, vinegar, or soap can cause coughing, wheezing, and serious lung damage. After applying any cleaner, rinse every surface multiple times with fresh water. Let everything dry completely before your bird returns to the cage.
How do I know if mold is growing in the cage?
Look for dark spots, fuzzy patches, or a musty smell inside corners and under perches. Mold thrives in damp areas. Check your cage weekly during cleaning. If you spot mold, soak affected parts in vinegar solution for 10 minutes, scrub thoroughly, and dry completely. Mold poses a serious respiratory threat to birds, so address it immediately.